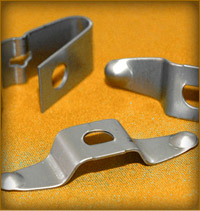
Hardened & Tempered Automotive Brake Parts
At Nelson Heat Treating Co., Inc. one of our goals is to build productive, long-term relationships with our clients. We accomplish this not only by providing competent and responsive services, but also by sharing our insights and technical knowledge to offer additional value in terms of time and cost savings to our clients overall manufacturing operations.
One of our long-term customers is a manufacturer of aftermarket and OEM parts for the automotive industry. Over the past 25 years, we have continually engaged with them on many different projects, including the heat treating of a variety of brake parts. Fabricated from AISI 1050 carbon steel, these thin gauge components range from .0015″ to .0060″ in thickness. Heat treating is comprised of both a hardening and tempering process to achieve the desired balance of physical properties. In its hardened state, carbon steel is brittle and has a tendency to break before bending or deforming, and tempering it serves to make the steel tougher and more resistant to fracturing.
Depending on volume requirements and part size, we use our shaker furnace or continuous belt furnace to heat treat the components at temperatures in the 1,500°F to 1,620°F range. Quality assurance involves Rockwell C-scale hardness inspections. By taking the time to gain an understanding of this client’s products, we are able to meet their needs very effectively. Process optimization allows us turn jobs around for them very rapidly, typically within 24-48 hours.
To learn more about how our heat treating expertise can add value to your next project, contact us today.
Brake Parts Project Highlights
- Project Name & Description
-
Brake Parts
- Aftermarket and OEM
- Capabilities Applied/Processes
-
Heat Treatment
- Hardened and Tempered
- Equipment Used to Manufacture Part
-
Shaker / Continuous Belt
Temperature: 1500°F to 1620°F
- Overall Part Dimensions
-
Thickness: .0015″ – .0060″
- Material Used
-
AISI 1050 Carbon Steel
- Industry for Use
-
Automotive
- In Process Testing/Inspection Performed
-
Hardness Inspection C-scale
Rockwell Hardness Testing
- Delivery/Turnaround Time
-
1 to 2 days
- Standards Met
-
Customer Specification

